
Sub Zero wine fridge panel installation can give your kitchen a seamless, custom-built look. This task might seem complicated, but with the right guidance, it’s a project that homeowners can handle themselves. Our step-by-step guide will walk you through the entire process, from selecting the right panel to securing it in place, making the installation of your Sub Zero wine fridge panel as simple and straightforward as possible. Whether you’re replacing an old panel or adding one for the first time, follow this guide to achieve professional results without hiring a contractor.
Step-by-Step Guide to Sub Zero Wine Fridge Panel Installation
1. Gather Necessary Tools and Materials
Before starting your Sub Zero wine fridge panel installation, ensure you have the right tools and materials. Having everything on hand will help the process run smoothly.
-
Tools:
- Screwdriver set (Phillips and flathead)
- Measuring tape
- Power drill (if needed)
- Level
- Rubber mallet
-
Materials:
- Custom panel (designed for your Sub Zero model)
- Screws and brackets (often supplied with the fridge)
- Adhesive tape (optional for temporary holding)
Make sure the custom panel fits your fridge’s specifications. If necessary, consult your Sub Zero owner’s manual for details on panel size.
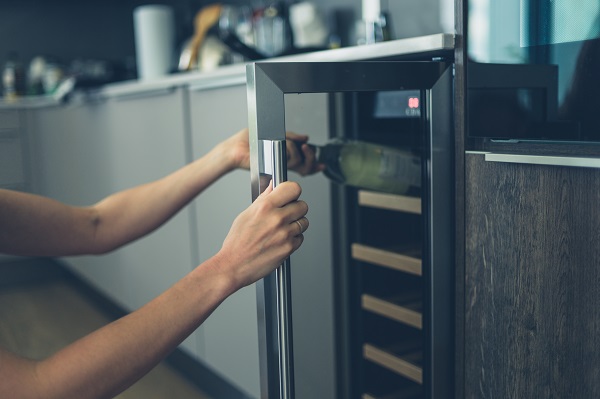
2. Remove the Existing Fridge Door Panel
If your fridge already has a panel that you’re replacing, you’ll need to remove it before installing the new one. Follow these steps:
- Unplug the fridge: Always prioritize safety. Unplug your wine fridge before starting the installation.
- Loosen screws: Open the fridge door and locate the screws securing the existing panel. Using a screwdriver, carefully unscrew them and set them aside.
- Detach the panel: Gently lift and remove the old panel from the door. If it’s sticking, use a rubber mallet to tap it loose without damaging the frame.
3. Prepare the New Custom Panel
Once the old panel is removed, it’s time to prepare the new custom panel.
- Measure and confirm fit: Before attaching the new panel, use a measuring tape to verify that the dimensions match your fridge door. The panel should cover the front surface completely.
- Align properly: Hold the panel against the fridge door to check that the edges align perfectly. You may use a level to ensure the panel is straight.
- Mark screw locations: If your panel doesn’t have pre-drilled holes, mark the locations where screws will be inserted, based on the fridge’s door frame.
4. Attach the Panel to the Fridge Door
Now that your panel is prepared, it’s time to attach it to the fridge door.
- Insert screws into the door frame: Using the pre-drilled holes on the fridge frame, secure the custom panel with screws. Be sure to tighten them enough to hold the panel in place but avoid over-tightening, which could damage the panel.
- Use brackets for extra support: Depending on the model, your fridge might come with brackets to provide additional support. Install them as per the manufacturer’s instructions.
- Check alignment again: Before fully tightening the screws, double-check that the panel is aligned straight. Make any necessary adjustments to ensure the panel is level.
5. Test the Door Functionality
Once the panel is secured, test the fridge door to make sure it operates correctly.
- Open and close the door: Ensure that the door opens smoothly without any resistance.
- Check the seal: Look at the door’s seal to confirm that it is closing tightly, preventing cold air from escaping.
- Adjust screws if needed: If the door isn’t functioning as it should, adjust the screws or reposition the panel to achieve a perfect fit.
6. Final Adjustments and Finishing Touches
After successfully attaching the panel and verifying the door’s functionality, focus on final adjustments.
- Smooth out edges: Use a cloth to wipe down the edges of the panel, ensuring no dust or residue is left behind.
- Install decorative trim: If your panel has a decorative trim, now is the time to attach it. This will complete the custom look of your Sub Zero wine fridge.
- Power on the fridge: Plug the fridge back in and ensure it’s functioning properly.
By following these steps, you’ll have successfully completed your Sub Zero wine fridge panel installation, giving your kitchen a polished, high-end appearance.
Key Considerations for a Smooth Installation
-
Panel Size and Compatibility
Not all custom panels are created equal. Be sure to purchase a panel specifically designed for your Sub Zero model. If the panel is too large or too small, you’ll face alignment and functionality issues.
-
Proper Tool Use
Using the right tools for the job is crucial to avoid damaging the fridge or panel. A rubber mallet, for instance, can be a safer option than a hammer when you need to make minor adjustments.
-
Safety Precautions
Unplugging the fridge is essential, as is handling all materials with care. Be mindful when removing the old panel to prevent scratches or dents.
Final Thoughts
Installing a Sub Zero wine fridge panel is a fantastic way to customize the look of your kitchen. By following these detailed steps, you can achieve a flawless installation that saves you the cost of hiring a professional. Remember, accuracy is key—from measuring the panel to properly aligning it during installation. Take your time with each step, and you’ll end up with a beautifully integrated wine fridge.
If you ever encounter difficulties during the installation process, consulting Sub Zero Repair Net can provide additional guidance. We have vast knowledge and expertise in Sub Zero Wine Cooler Repairs and other services.
Click follow to get the latest updates!